



How to: Lay Weed Control Fabric Properly - A Step-by-Step Guide
Given the current drought in the UK, we've all seen our gardens struggle with growth. The one thing that hasn't stopped growing? Weeds.
Whether you're creating a low-maintenance flower bed, laying decorative gravel, or tackling persistent garden weeds, weed control fabric can be a simple and effective solution. When installed correctly, it helps suppress unwanted weed growth while allowing air, water, and nutrients to reach the soil beneath.
In this guide, we'll take you through the process of laying weed control fabric properly to help ensure long-lasting results.
Why Use Weed Control Fabric?
Weed control fabric acts as a barrier between the soil and sunlight, suppressing and preventing weeds from growing through the surface. It's ideal for:
- Decorative gravel areas
- Pathways and walkways
- Flower beds and borders
- Around trees and shrubs
- Raised garden beds
- Landscaping projects
When combined with a suitable bark, mulch or aggregate, weed control fabric can significantly reduce garden maintenance and keep outdoor spaces looking tidy throughout the year.
What You'll Need
Before you begin, gather the following:
- Weed control fabric
- Ground pegs
- Sharp scissors or a utility knife
- Tape measure
- Garden rake
- Spade or hoe
- Decorative gravel, bark mulch, or another suitable covering
Step 1: Clear the Area Thoroughly
The most important part of any weed control fabric installation is preparation.
Remove all existing weeds, grass, roots, stones, and debris from the area. If perennial weeds such as nettles, bindweed, or couch grass are present, make sure the root systems are removed as thoroughly as possible.
Once cleared, rake the ground level to create a smooth, even surface.
Top Tip: Installing fabric over existing weeds may only provide a temporary solution, as vigorous weeds can eventually force their way through gaps or seams.
Step 2: Measure and Cut the Weed Control Fabric
Measure the area you intend to cover and cut the weed control fabric to size.
Allow for a small overlap if you're covering a large space with multiple sections. Generally, an overlap of around 100-150mm is sufficient to prevent weeds from finding their way through joins.
If you're installing around existing plants, mark their positions and cut small cross-shaped slits where stems or trunks will emerge.
Step 3: Position the Fabric
Roll out the weed control fabric across the prepared ground.
Ensure the material sits flat against the soil without large wrinkles or folds. Taking time to smooth the fabric at this stage will help achieve a neater finish and make securing it easier.
Where multiple sheets are required, overlap the edges to maintain complete coverage.
Step 4: Secure with Ground Pegs
Using landscape staples or ground pegs, secure the fabric firmly to the ground.
As a general guide:
- Place pegs every 0.5 to 1 metre around the perimeter.
- Add additional pegs at overlaps and corners.
- Secure any areas that appear loose or prone to lifting.
Proper fixing helps prevent movement during strong winds and keeps the fabric tightly in place over time.
Step 5: Cut Planting Holes (If Required)
If you're planting through the fabric, cut a neat X-shaped opening where each plant will go.
Fold back the corners, dig your planting hole, and install the plant as normal. Once planted, fold the fabric back around the base of the plant.
Keep cuts as small as possible to minimise opportunities for weeds to emerge.
Step 6: Apply Your Chosen Surface Covering
Weed control fabric should usually be covered for the best performance and appearance.
Popular options include:
- Decorative gravel
- Slate chippings
- Bark mulch
- Wood chippings
- Decorative stone
Apply a suitable layer across the fabric, ensuring the material is fully concealed.
A covering layer helps:
- Improve the appearance of the area
- Protect the fabric from UV exposure
- Reduce movement caused by weather
- Enhance weed suppression
Common Mistakes to Avoid
Not Preparing the Ground Properly
Failing to remove existing weeds before installation can lead to persistent growth later.
Leaving Gaps Between Sheets
Even small gaps can become entry points for weeds. Always overlap adjacent sections.
Using Too Few Pegs
Insufficient fixing may allow fabric to lift, wrinkle, or move over time.
Leaving Fabric Exposed
Covering the fabric with gravel, bark, or decorative aggregates helps improve both longevity and appearance.
Making Large Cuts Around Plants
Oversized openings create opportunities for weeds to establish themselves.
How Long Does Weed Control Fabric Last?
The lifespan of weed control fabric depends on the grade and application. High-quality woven fabrics used beneath decorative aggregates can provide many years of reliable weed suppression when installed correctly and maintained properly.
Regularly removing wind-blown seeds, fallen leaves, and accumulated debris from the surface will help maintain effectiveness over time.
Final Thoughts
Installing weed control fabric is a straightforward project that can make a significant difference to the appearance and maintenance of your garden. By taking the time to prepare the ground properly, secure the fabric correctly, and finish with a suitable surface covering, you'll create a tidy, attractive space with fewer weeds to manage.
Whether you're refreshing borders, creating a decorative stone area, or building a low-maintenance landscape, weed control fabric provides a practical foundation for long-term weed control.
Shop Weed Control Fabric at Suregreen
Looking for reliable weed control solutions for your garden project? Suregreen offers a range of weed control fabrics, ground pegs, and landscaping essentials to help you achieve professional-looking results with ease.
Browse our range today and take the first step towards a cleaner, lower-maintenance garden.
Reviewed by: Suregreen Product Specialists
Last Updated: August 2026




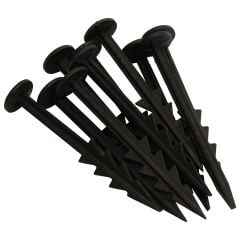


- SKU: 877937-877982
- Size: 1m x 10m, 1m x 14m, 1m x 100m, 2m x 10m, 2m x 25m, 2m x 50m
- Colour: Black
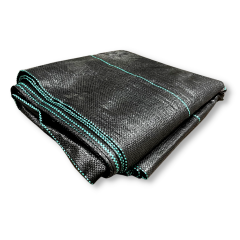
- SKU: 205701-205794
- Size: 1m x 15m, 1m x 100m, 1m x 50m, 4m x 100m, 2m x 50m, 2m x 100m , 2m x 10m